 |
|


03-11-2013, 08:02 PM
|
 |
Hummer Expert
|
|
Join Date: Sep 2011
Location: Surprise, AZ
Posts: 717
|
|
 Re: LoJac963's Deuce Build
Quote:
|
Originally Posted by ROUSHDEMON
Did you get my PM on my Fender Flares?
|
I did not, I got the one regarding your BG but not on the flares. I'm going to be buying some Delta fogs right now but shoot me a PM on the price and I'll see if I can swing that also! |
03-11-2013, 09:34 PM
|
 |
Hummer Expert
|
|
Join Date: Feb 2009
Location: Nashville, TN
Posts: 887
|
|
Re: LoJac963's Deuce Build
Quote:
|
Originally Posted by LoJac963
I did not, I got the one regarding your BG but not on the flares. I'm going to be buying some Delta fogs right now but shoot me a PM on the price and I'll see if I can swing that also!
|
PM sent.
__________________
2003 Black H2:
Blacked out,7" lift,40" Pitbull Rockers, 20x12 Fuel Octanes and lots of more junk, DemonGuard Brushguard  2006 Blue H2
:
20x12 black Rockstars & 35"s. missed.
2005 Black Mustang Roush Stage 1 #05-1058:
Showcar, Procharged 580HP, 20" Gianelle's, Prokit, 1/8 in 7.56secs.
2009 Silver Cadillac CTS Premium
White interior, lots of future mods.
|
04-16-2013, 02:41 AM
|
|
Hummer Expert
|
|
Join Date: Sep 2011
Location: Surprise, AZ
Posts: 717
|
|
Re: LoJac963's Deuce Build
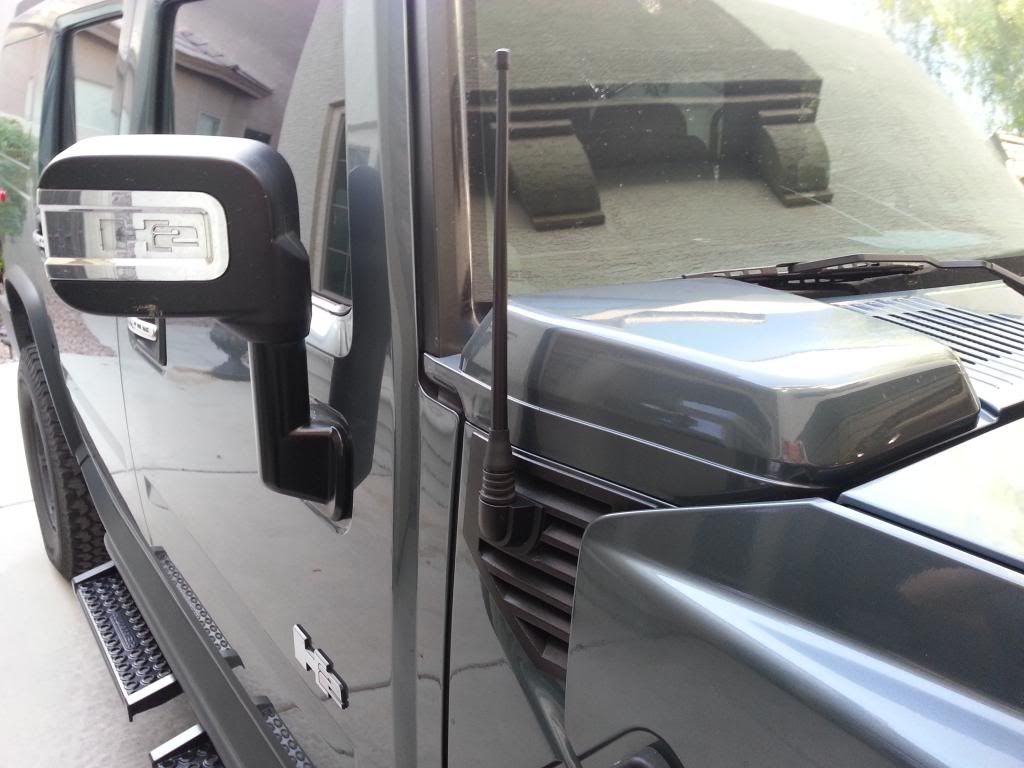
Small update, figured I'd jump on the snubby antenna train......
Also cut the stock boot to seal everything up and make it look better.
 |
04-22-2013, 05:16 AM
|
|
Hummer Expert
|
|
Join Date: Sep 2011
Location: Surprise, AZ
Posts: 717
|
|
Re: LoJac963's Deuce Build
Another update.
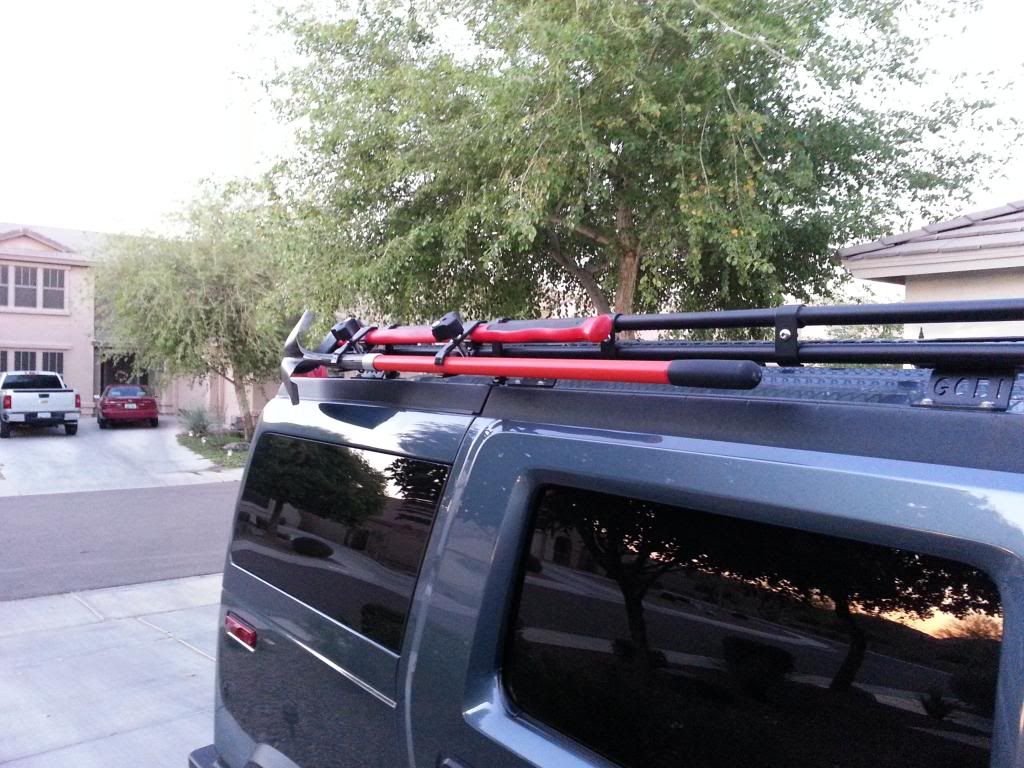
GOBI axe/shovel attachment arrived on Friday. Only took about a week to get here!
Here's the pics, found a red axe and shovel. I also put small circle rubber adhesive protectors on all the contact points where the handles touch the mounts. They not only hold stronger but also keep the handles from turning. I also sprayed the metal on the axe and shovel with a satin clear coat to protect them from the elements.
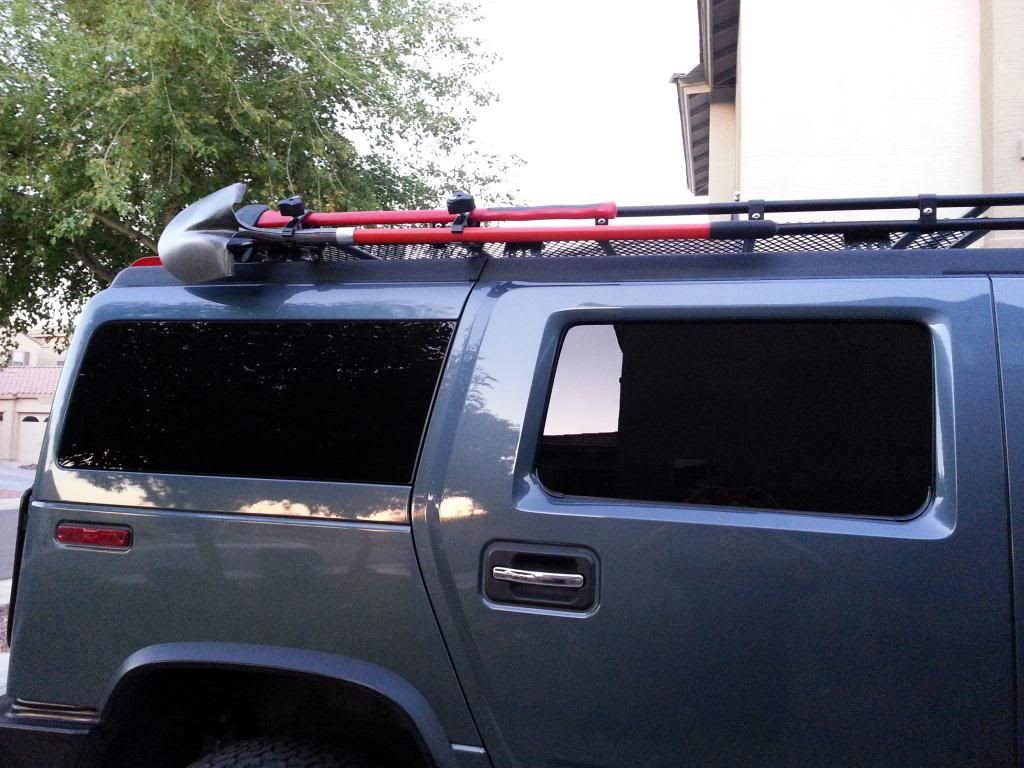
More to come! |
05-01-2013, 05:40 AM
|
|
Hummer Expert
|
|
Join Date: Sep 2011
Location: Surprise, AZ
Posts: 717
|
|
Re: LoJac963's Deuce Build
Next update:
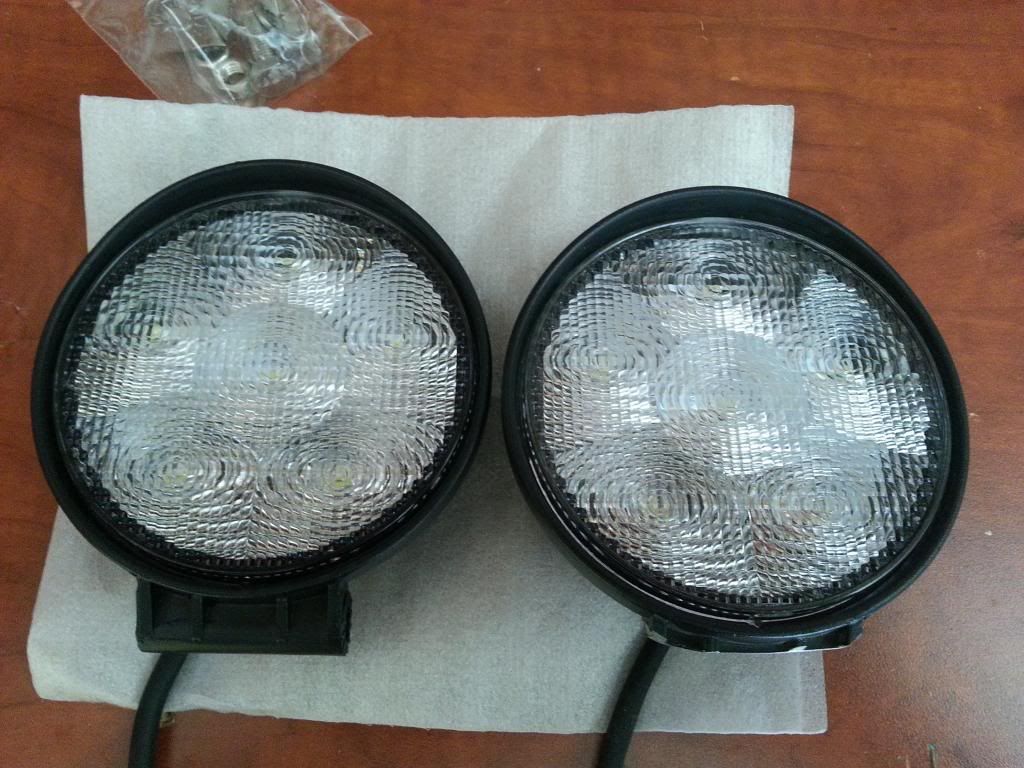
I fitted in 4" round LED lights into my DRL's. The light itself if 4" but a total of 5" including the bottom mounting boss. I'll go over the install here.
These are my stock DRL's. You can see the lens is completely burned away at the top, as was the oem 4114 burned at the base. I don't know why these things run so hot.
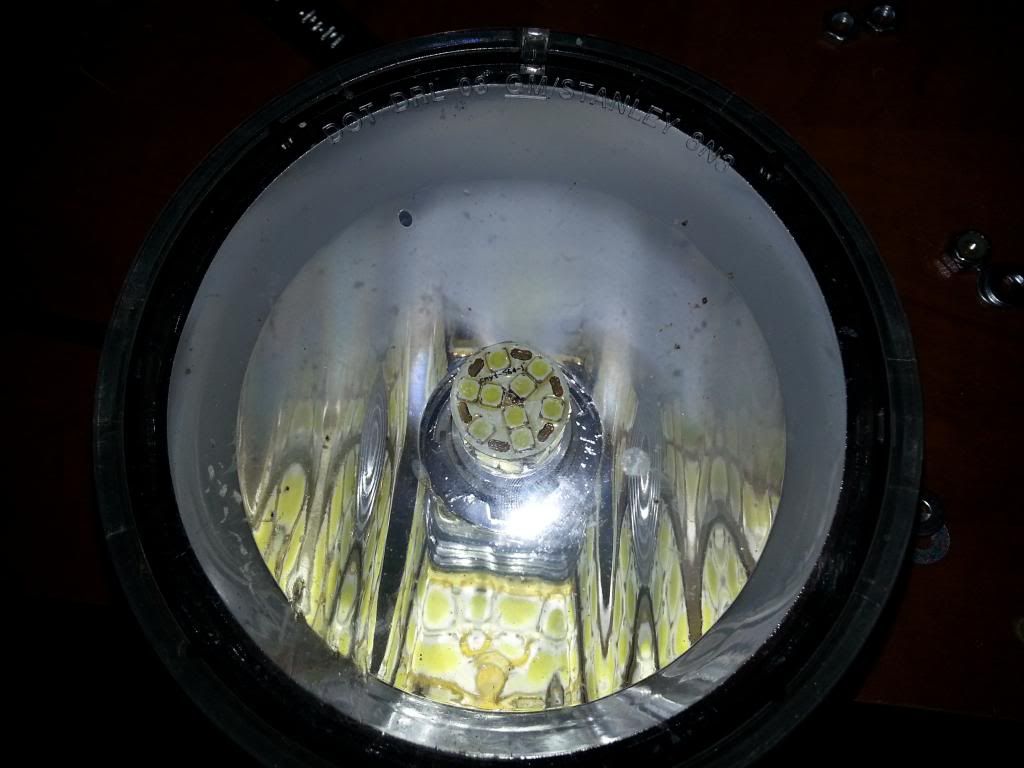
If you've seen this thread I also added the ceramic substrate SMD LED towers which were pretty bright however these LED lights blow the towers out of the water:
Here's the lights, the right one has the mounting boss ground off:
Better pic of the mounts ground off and painted:
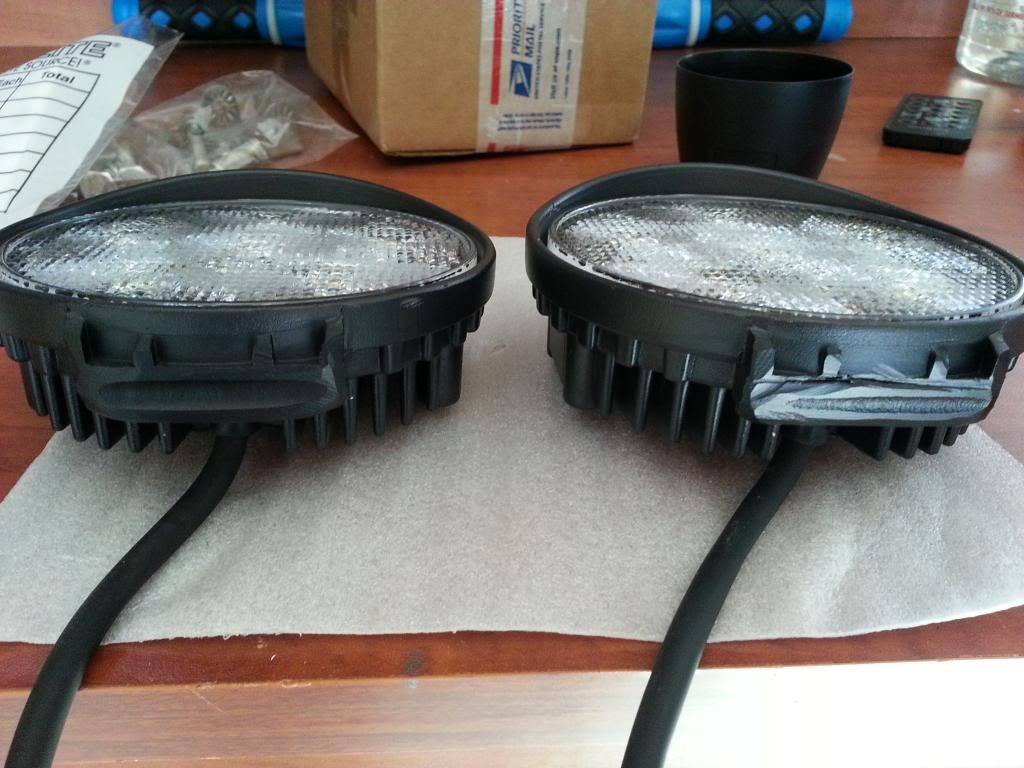
The back of the lights have 4 holes for mounting tabs as a second mounting option. What I did was cut some 2" long 10-32 thread studs. Screwed them into the lights and secured them with a washer and nylon lock nut:

After that it's all downhill. Those studs will fit exactly into the factory holes. I put another nylon locking nut and washer before the end of the threads to prevent the light from falling back. Then one more washer and regular nut on the back of the bumper to hold everything tight.
This way the heatsink fins do not touch any of the plastic of the bumper, these lights do get pretty toasty. I'd imagine driving though the should stay cool with wind blowing over them.
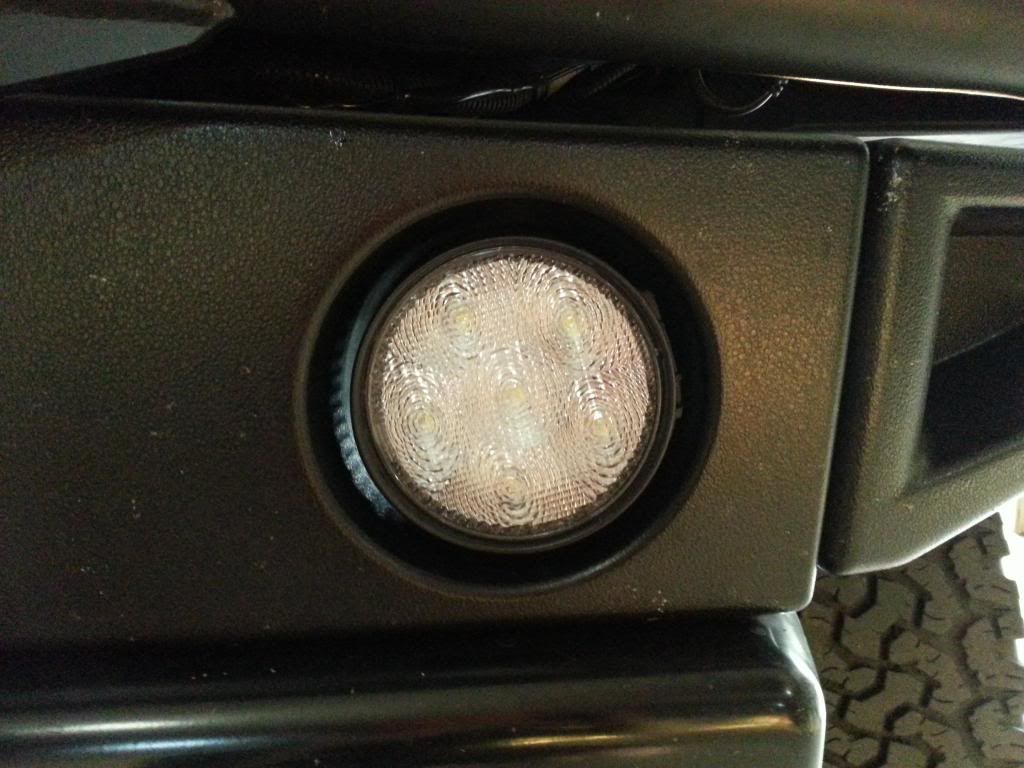
Here's a pic of one installed:

Another pic:
My LED towers were very bright compared to the factory bulbs. Here's the comparison between my LED towers on the left and the new LED lights on the right:
I still have to do the wiring, the pic above was just connected with jumpers. Shouldn't be difficult though, couple of pins, heatshrink and done.

|
05-02-2013, 03:53 PM
|
 |
Hummer Veteran
|
|
Join Date: Dec 2012
Location: St. Louis
Posts: 124
|
|
Re: LoJac963's Deuce Build
[quote=LoJac963]Small update, figured I'd jump on the snubby antenna train......
Also cut the stock boot to seal everything up and make it look better.
I put mine on last night. It looks pretty sweet, but I noticed a loss of reception on most of the stations in the St. Louis area. Kinda bummed about that, as I really like the look of it.
__________________
Keeping St. Louis Zombie-free since 2008
1984 M923A1 5 ton 6x6 Cargo
2006 H2 SUT Twilight Maroon SOLD
2004 H2 Hummer Black SOLD
(5) 37 x 12.50 R16.5 Goodyear MT/R Kevlar lined
HMMWV 24 bolt 2 piece wheels
Hutchinson VFI Anti-Mine runflats
Road Rhino 1/4" steel bumper
1972 Corvette Stingray
Built in St. Louis Day 1, car #75 off assembly line
2013 Infiniti G37X
wife's car
|
05-03-2013, 12:00 AM
|
|
Hummer Expert
|
|
Join Date: Sep 2011
Location: Surprise, AZ
Posts: 717
|
|
Re: LoJac963's Deuce Build
I only listen to XM so I have no idea about the radio reception lol.
|
05-27-2013, 09:00 AM
|
 |
Hummer Veteran
|
|
Join Date: Jun 2011
Posts: 33
|
|
Re: LoJac963's Deuce Build
Outstanding  |
05-27-2013, 03:33 PM
|
|
Hummer Expert
|
|
Join Date: Sep 2011
Location: Surprise, AZ
Posts: 717
|
|
Re: LoJac963's Deuce Build
Thanks! Another update coming this week. |
06-02-2013, 12:33 AM
|
|
Hummer Expert
|
|
Join Date: Sep 2011
Location: Surprise, AZ
Posts: 717
|
|
Re: LoJac963's Deuce Build
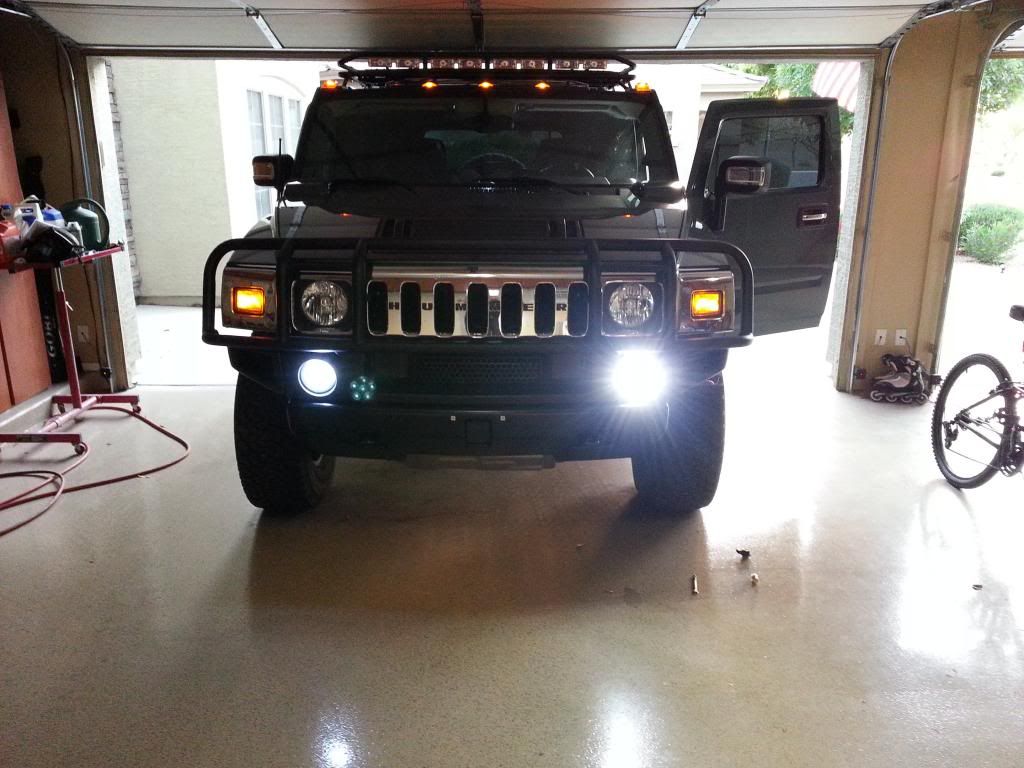
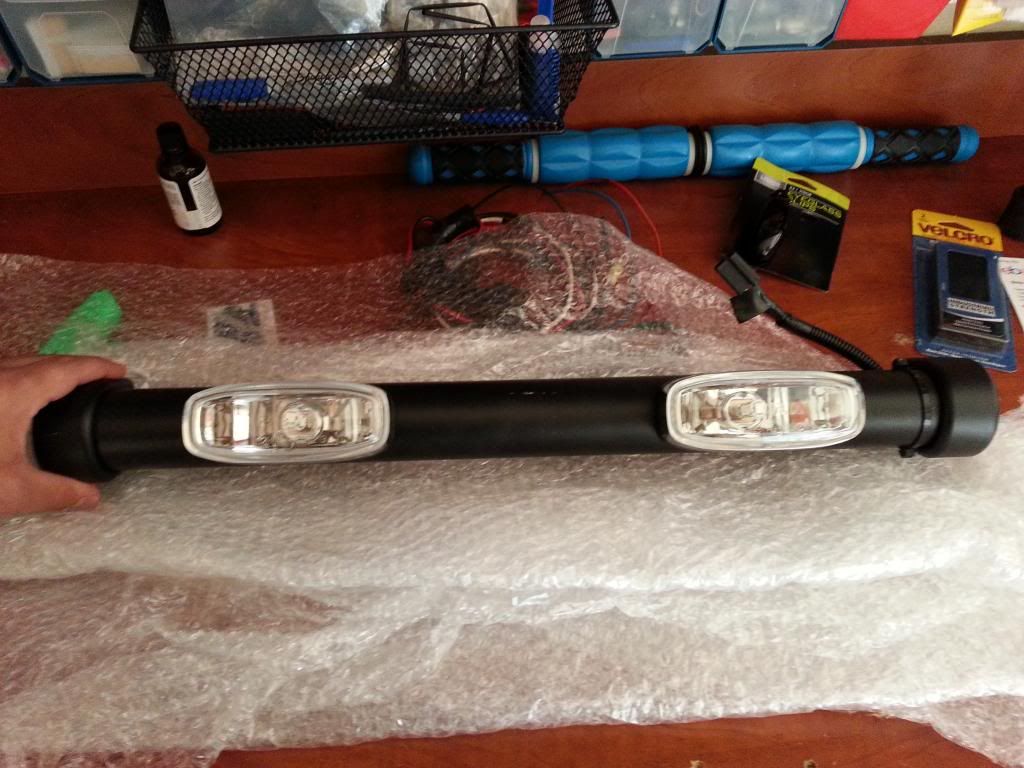
Here's the next update. Picked up a Plus1 foglight bar. Came used with some scratches so I repainted everything, added some higher wattage bulbs and mounted it. I love the look of more lights at the bottom!
This was the bar when it first arrived:
Painted and installed:
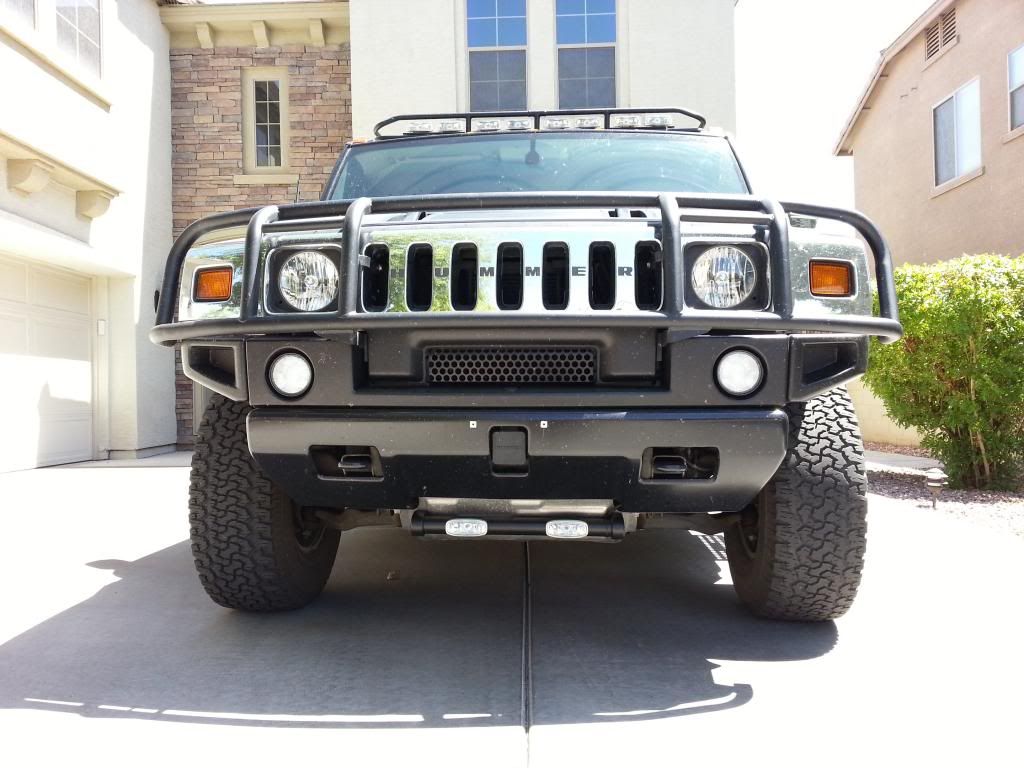
Another shot:

All the lights on:

Now if I could just find those cowel lights for a good price!!! lol |
06-05-2013, 06:56 AM
|
|
Hummer Expert
|
|
Join Date: Sep 2011
Location: Surprise, AZ
Posts: 717
|
|
Re: LoJac963's Deuce Build
So I'm in the process of getting rid of the Plasti Dip and going with more permanent stuff.
This is what I used for the fuel door:
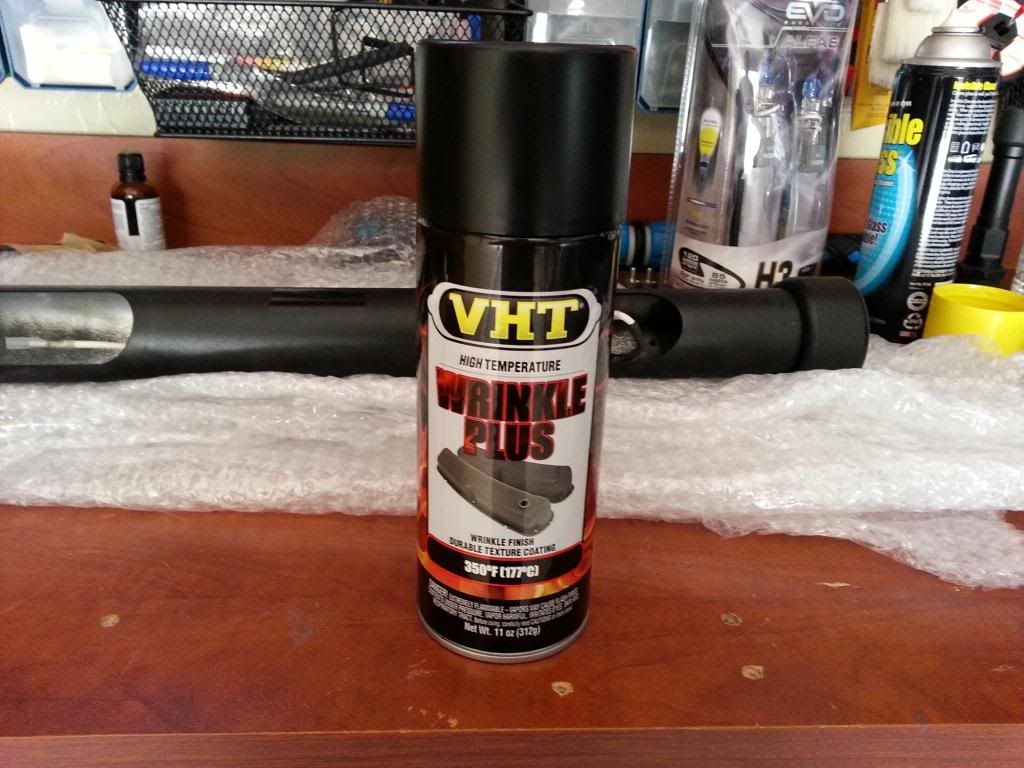
I didn't think it would wrinkle quite as much as it did but its pretty cool looking:


Also will be painting my rims with engine enamel low gloss black. I pulled the wheels today, wire wheeled the hell out of the hub centers and sprayed them black. Touched up the plasti dip on the center of the wheels to see how everything would look and I really like it with the caps off.
Next will be to have the wheels rebalanced to get the weights off the outside, strip them and paint them with rattle cans so I don't have to worry about peeling plasti dip.
Here's a pic of one of the wheels:

I'm also thinking about getting long splined lugs in black so they completely cover the studs and stick out a bit but I still have to look around a bit. |
06-06-2013, 04:28 AM
|
|
Hummer Veteran
|
|
Join Date: Oct 2007
Location: Arizona
Posts: 55
|
|
Re: LoJac963's Deuce Build
looking great lojac!! Great Mods. Love all the LED work. Something I def need to do as a few of mine are out in my truck. If you ever do gather up the bulbs you used for the meetup you were discussing with another member let me know. I live in Phoenix and would def be interested in a meetup.
|
06-06-2013, 12:08 PM
|
|
Hummer Expert
|
|
Join Date: Sep 2011
Location: Surprise, AZ
Posts: 717
|
|
Re: LoJac963's Deuce Build
oh awesome, where in phoenix? We are both west valley.
|
06-10-2013, 12:28 PM
|
|
Hummer Veteran
|
|
Join Date: Oct 2007
Location: Arizona
Posts: 55
|
|
Re: LoJac963's Deuce Build
43rd ave and glendale.
|
06-10-2013, 01:42 PM
|
 |
Moderator
|
|
Join Date: May 2011
Location: Az
Posts: 237
|
|
Re: LoJac963's Deuce Build
Well well, it sounds like the Phoenix H2's need to have a meetup someplace in the northwest valley sometime soon!!!! (I recall years ago back when I had my Tundra, it was really great to meet up with fellow Tundra owners and see what they have done to their rigs and listen to the stories about the mods they did and how they did them.)
LoJack and I have been teasing one another about doing mods on our H2's, its like each week one of us has a new mod to do but after looking at his rig, theirs no way I can compete with him. Hes just got mod after mod done and I just sit here in awe of his creativity. Its almost like watching an artist paint a picture on a canvas and end up with something so cool, you end up saying to yourself..........damn, I wish I had thought of that mod.
Anyway, lets plan on getting everyone rounded up soon at someplace between all of us. |
06-10-2013, 07:17 PM
|
|
Hummer Expert
|
|
Join Date: Sep 2011
Location: Surprise, AZ
Posts: 717
|
|
Re: LoJac963's Deuce Build
^lol you're too funny man. If you want do knock out some of them like the LED's just let me know. That could easily be done!
We all should definitely meet up. I wonder how many other H2's are on the sites here in the valley. Maybe we should start posting in the regional sections to see.  |
06-13-2013, 12:04 PM
|
|
Hummer Veteran
|
|
Join Date: Oct 2007
Location: Arizona
Posts: 55
|
|
Re: LoJac963's Deuce Build
Quote:
|
Originally Posted by fyr145
Well well, it sounds like the Phoenix H2's need to have a meetup someplace in the northwest valley sometime soon!!!! (I recall years ago back when I had my Tundra, it was really great to meet up with fellow Tundra owners and see what they have done to their rigs and listen to the stories about the mods they did and how they did them.)
LoJack and I have been teasing one another about doing mods on our H2's, its like each week one of us has a new mod to do but after looking at his rig, theirs no way I can compete with him. Hes just got mod after mod done and I just sit here in awe of his creativity. Its almost like watching an artist paint a picture on a canvas and end up with something so cool, you end up saying to yourself..........damn, I wish I had thought of that mod.
Anyway, lets plan on getting everyone rounded up soon at someplace between all of us. |
I can remember seeing quite a few over the past few years here in the greater Phoenix area. I'm definately in to meetup sometime. And Lojack I'm definately interested in seeing your guages and doing an LED swap on the interior.
|
06-13-2013, 01:53 PM
|
|
Moderator
|
|
Join Date: May 2011
Location: Az
Posts: 237
|
|
Re: LoJac963's Deuce Build
well then, lets check our calendars and pick a few dates that everyone's off from work then select a place to meet at around lunch time. Usually restaurants like TGI Fridays, Applebees, Chilis', or Red Robin make good meet & eat events, and we have plenty of these here in the valley.
Just a thought. Once we have this done, I will make a post in the Local Events & Activities forum for the Az Hummers and see if anyone else can show up.  |
06-14-2013, 11:56 AM
|
|
Hummer Veteran
|
|
Join Date: Oct 2007
Location: Arizona
Posts: 55
|
|
Re: LoJac963's Deuce Build
Quote:
|
Originally Posted by fyr145
well then, lets check our calendars and pick a few dates that everyone's off from work then select a place to meet at around lunch time. Usually restaurants like TGI Fridays, Applebees, Chilis', or Red Robin make good meet & eat events, and we have plenty of these here in the valley.
Just a thought. Once we have this done, I will make a post in the Local Events & Activities forum for the Az Hummers and see if anyone else can show up. |
I work nights at the hospital....3 days a week so I should be able to make just about anything in the afternoon. |
06-17-2013, 04:16 AM
|
 |
Hummer Professional
|
|
Join Date: Sep 2008
Location: Utah
Posts: 293
|
|
Re: LoJac963's Deuce Build
LED's look great! Wish I was in the area as I would pay you to help me do mine. I don't have people like that in my area that would do mods like that so I am either doing it myself and figuring it out on my own or it's just not happening. Let me know if you are ever in the UT are for a week or so... Lol!
__________________
Sweet looking H2 with not enough mods (2003 Pewter H2, 20" Rockstars, 40"x15.5" Toyo MT's, E&G Extended Flares, Full body tube steel exoskeleton, 5" Skyjacker lift, Amp Research steps, Gobi Roofrack and ladders, Smoked LED's, AFe CAI, Dynatech long tubes and cats, Magnaflow exhaust, Stock tune, 4.88 gears, Chrome Grenade Shifter, interior blacked out, rear captains chairs, Solar Power!!)
|
| Thread Tools |
Search this Thread |
|
|
|
| Display Modes |
 Linear Mode Linear Mode
|
 Posting Rules
|
You may not post new threads
You may not post replies
You may not post attachments
You may not edit your posts
HTML code is Off
|
|
|
All times are GMT +1. The time now is 01:45 AM.
|


